Learn how to do You May Be Surprised! Pan-Seared Duck Breast with Duck Confit and Collard-Stuffed Crepes for your friends and family.
this revenue from You May Be Surprised! Pan-Seared Duck Breast with Duck Confit and Collard-Stuffed Crepes it is delicious
Make You May Be Surprised! Pan-Seared Duck Breast with Duck Confit and Collard-Stuffed Crepes
What's that you say...Duck, now where am I going to get Duck breasts? I am seeing Duck in a several of my local super markets and of course you always have the option of going to a local butcher or specialty deli and buying what they have cut and on display or ordering it from them. Speaking of ordering, you certainly can order duck from several online meat purveyors. (I have also seen duck at Sam's Club and BJ's). In this case, the duck dish gets a little "Southern Charm" added to it with the addition of crepes filled with Collard greens!
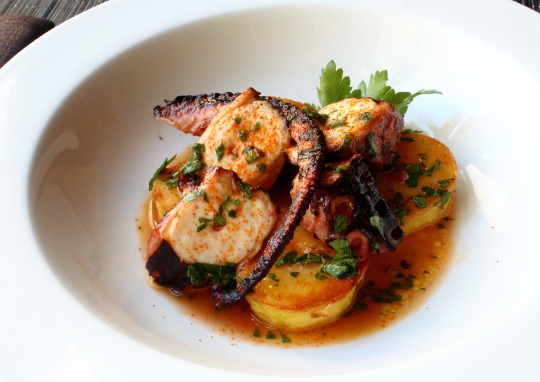
Pan-Seared Duck Breast with Duck Confit and Collard-Stuffed Crepes
Ingredients
Serves 6
Confit
3 5-pound ducks, leg-thigh pieces and breasts cut from carcasses, wings cut from breasts, carcasses reserved
1/4 cup herbes de Provence*
1 1/2 teaspoons ground cinnamon
1 teaspoon ground nutmeg
3/4 teaspoon ground white pepper
2 garlic cloves, minced
2 teaspoons minced peeled fresh ginger
4 7-ounce containers rendered duck fat**
Sauce
2 cups chopped onions
2 cups chopped carrots
2 cups chopped celery
1 small bunch Italian parsley
4 large sprigs fresh thyme
3 bay leaves
1/2 teaspoon whole black peppercorns
16 cups low-salt chicken broth
2 teaspoons honey
Crepes
1 1/2 cups whole milk
3/4 cup cornmeal
3/4 cup all purpose flour
2 large eggs
1 tablespoon melted butter plus additional for brushing
3/4 teaspoon salt
2 bacon slices, chopped
1 1/4 cups chopped onions
1 12- to 13-ounce bunch collard greens, tough stems removed, leaves coarsely chopped (about 6 cups)
2 cups low-salt chicken broth
1 tablespoon honey
4 cups assorted herb sprigs (such as parsley, dill, mint, and chopped chives)
Extra-virgin olive oil
Directions
Confit
Place duck leg-thigh pieces in 13x9x2-inch glass baking dish. Cover and chill duck breasts, carcasses, and wings.
Whisk herbes de Provence and next 3 ingredients in small bowl. Mix in garlic and ginger. Rub mixture over duck leg-thigh pieces. Sprinkle with salt and pepper. Cover and chill overnight.
Preheat oven to 275°F. Rub excess spice mixture from duck leg-thigh pieces; return duck to dish.
Melt duck fat in medium saucepan over medium heat. Pour duck fat over legs. Cover dish tightly with foil. Roast duck until meat is falling from bones, about 6 hours. Cool.
Pull meat off bones in bite-size pieces; discard skin and bones. Place meat in medium bowl. Strain duck fat into bowl with duck meat, completely submerging meat. Cover and refrigerate. DO AHEAD Can be made 2 days ahead. Keep chilled.
Sauce
Working in batches, brown duck carcasses and wings in large pot over high heat, about 13 minutes per batch. Pour off all but 3 tablespoons fat from pot.
Add onions, carrots, and celery to pot and sauté until browned, about 10 minutes, stirring often. Add parsley, thyme, bay leaves, and peppercorns; stir to coat.
Add chicken broth, carcasses, and wings; bring to boil. Reduce heat to medium-low and simmer 4 hours, occasionally spooning fat from surface of pot.
Pour stock through fine-mesh strainer into large bowl. Chill overnight.
Spoon fat from top of stock. Return stock to saucepan and boil until reduced to 2 cups, about 1 hour. Strain again. Stir in honey. Season sauce with pepper. DO AHEAD Can be made 2 days ahead. Cover and chill. Rewarm before serving.
Crepes
Puree whole milk, cornmeal, flour, eggs, 1 tablespoon melted butter, and 3/4 teaspoon salt in blender until smooth. Cover and chill crepe batter at least 2 hours and up to 24 hours.
Cook bacon in large pot over medium heat until most of fat is rendered and bacon is browned. Add onions and sauté until onions are soft, about 5 minutes. Add collard greens and cook until wilted, stirring occasionally, 3 to 4 minutes. Add chicken broth and increase heat to high. Bring to boil; reduce heat to medium-low, cover, and simmer until greens are tender, about 1 hour. Uncover and boil until liquid evaporates, about 15 minutes. Set aside.
Heat 10-inch-diameter skillet with 7-inch-diameter bottom over medium-high heat. Brush skillet with melted butter. Pour scant 1/4 cup batter into skillet; swirl to cover bottom with batter. Cook until crepe looks dry around edges, about 1 minute. Flip over and cook just to set center, 10 to 15 seconds. Transfer crepe to plate. Repeat with remaining batter, making 12 crepes. Stack crepes between parchment paper or paper towels to prevent sticking.
Line large baking sheet with parchment paper. Rewarm duck confit in medium saucepan; strain. Working with 1 crepe at a time, spoon 1 heaping tablespoon duck confit and 1 heaping tablespoon collard greens onto top quarter of crepe. Fold crepe in half over filling, then in half again, forming triangle. Transfer to prepared sheet. Repeat with remaining crepes, duck confit, and collard greens. Brush tops of crepes with melted butter. DO AHEAD Can be made 2 hours ahead. Let stand at room temperature.
Preheat oven to 250°F. Using sharp knife, score skin of duck breasts diagonally to create 1-inch diamond pattern. Sprinkle all over with salt and pepper. Heat 2 heavy large skillets over medium-high heat. Add 3 duck breasts to each skillet, skin side down. Cook until fat is rendered and skin is brown and crisp, about 7 minutes. Turn and cook duck breasts to desired doneness, about 4 minutes for medium-rare. Transfer to work surface and brush skin with honey. Let duck breasts rest 10 minutes.
Meanwhile, place crepes in oven until heated through, about 10 minutes. Rewarm sauce. Mix herbs in medium bowl. Sprinkle with salt and pepper. Drizzle lightly with oil; toss to coat.
Cut duck breasts crosswise into 1/2-inch-thick slices. Place 2 warm crepes on each plate. Fan out 1 sliced duck breast on each plate. Drizzle sauce over. Garnish with herb salad and serve.
*A dried herb mixture; sold in the spice section of supermarkets and at specialty foods stores. If unavailable, a combination of dried thyme, basil, savory, and fennel seeds can be substituted.
**Rendered duck fat can be found in the freezer section of some supermarkets, at specialty foods stores, and online at dartagnan.com or gourmetfoodstore.com.
Share this recipe from You May Be Surprised! Pan-Seared Duck Breast with Duck Confit and Collard-Stuffed Crepes with your friends and groups